
It’s cold outside. You’ve fallen sick. What is it that you intuitively want to eat? For many of us, we have this urge inside of us to reach for a bowl of chicken noodle soup. There’s a reason for this, but it’s not for the noodles. It’s for the broth. Why? Because your body is so frickin’ smart it intuitively knows what foods you need to make you feel better, and it’s asking for a rich, nourishing bone broth. In today’s post I’m talking about bone broth, and I’ll cover bone broth benefits, how to make it, and I even have some bonus tips for you!
I also made my first ever Periscope video when I was making a batch of broth, so if you prefer to watch instead of read, then by all means, give this video a look:
What is Bone Broth?
Not only does bone broth taste amazing, but it has an infinite number of culinary uses. You can add it to sauces, make soups and stews, gravies, braise or roast meat or vegetables with it, or you can keep it simple and just heat some up in a mug and drink it instead of tea or coffee.
Bone Broth Benefits
There are a number of reasons that you should be consuming bone broth every day as part of your nutrient-rich, #UnDirty diet. Here are just a few reasons to get you started:
- Bone broth is an excellent source of minerals. Let me ask you this, what are bones made up of? Minerals! So by soaking them and simmering them into a broth, you’re actually extracting the minerals from the bones and putting them into the broth. If you’ve been looking for a good mineral-rich food source because you don’t want to be taking a mineral supplement, bone broth needs to be a part of your diet. Here are just a few of the easily absorbed minerals that are found in ample quantities within bone broth:
-
-
- Calcium – Have you been told to drink dairy to help keep your bones strong? I have news for you, bone broth is a waaaay better source of calcium than your daily glass of inflammatory cow dairy.
- Magnesium – This one’s super important because we are all deficient in it. Magnesium is needed for over 300 biochemical reactions in the body and helps with the transmission of nerve impulses, detoxification, energy production, and the formation of healthy bones and teeth.
- Phosphorus – Is also needed for the formation of healthy bones, as well as cellular repair, healthy digestion, and energy production.
- Potassium – Normally you’d likely reach for a banana when you want to get a dose of potassium, but next time, I suggest grabbing a mug of broth. Potassium’s needed by the body to help with recovery from heart and kidney disorders, coping with anxiety and stress, enhancing muscle strength, a healthy metabolism and balancing electrolytes.
-
What other healthy nutrients are contained within bone broth? If you make bone broth with plenty of knuckle bones, hooves or chicken feet, or leave the tendons and joints in tact from the animal, you’ll also get a higher amount of collagen in your broth. Collagen, or when it breaks down and becomes gelatin, is great at supporting joint health, and can give you glowing hair and skin, and hard, healthy nails. This gelatin can also help heal a leaky gut, so if you’ve ever suffered from any inflammatory or autoimmune disorders, then bone broth is a good option for you.
Bone broth also contains amino acids proline and glycine. Both these amino acids have significant roles in the body. Proline and glycine support detoxification pathways, aid in hemoglobin synthesis to build iron in the body, balance the nervous system, strengthen the immune system, and improve the secretion of gastric juices for better digestion and to heal the gut.
Getting Your Bone Broth
Luckily, making your own bone broth is both cheap, and super easy! (This is the good news folks!) I’m going to walk you through what you need to do to make your first batch of healthy, beautiful, nourishing broth.
Making Bone Broth
- 4 litres of water
- 2 tablespoons apple cider vinegar
- 2 large onions, unpeeled and coarsely chopped
- 2 organic carrots, scrubbed and coarsely chopped
- 3 organic celery stalks, coarsely chopped
- 2-4 lbs. meat or poultry bones
Equipment Used:
- Soup or stock pot OR
- Slow Cooker
- Sieve
- Mason Jars
- Canning Funnel
- Ladle
- Silicone Muffin Liners
What to do:
Step 1 – Find good quality bones. Quality is key here. I’d start by asking your local butcher, farmer at the farmer’s market, or if you’re like me and hunt, then make sure you save the bones from your game. You’ll want to ask the butcher or farmer about the animal the bones came from. Were the animals raised on pasture? And were they fed a natural and healthy diet? It’s also good to get a variety of bones, so ask for marrow bones, oxtail, and “soup” bones. Knuckle bones are great, as are any chicken feet or hooves that you can get your hands on.
Step 2 – Grab some organic vegetables to add to your broth for added flavour. I like using carrots, onions and celery. You’ll want to roughly chop your veg so they fit into the pot better.
Step 3 – For your equipment you should get a large soup pot if you plan to make your stock on the stove, or a slow cooker. I personally like using my slow cooker because to make a good broth you need the bones to simmer for 12-48 hours. Using my slow cooker means that I can leave the house without having to worry about leaving the stove on.
Step 4 – Add all of your bones to the pot and cover with the water until they are completely submerged. Add the vinegar, and allow the bones to just stand covered and soak for an hour. The vinegar will help draw out the minerals from the bones.
Step 5 – Start by bringing the liquid to a boil. If there’s any foam or scum that has risen to the surface, just skim this off. Now, add the chopped vegetables, and back off the temperature until you’ve reached a simmer. For me this means I’ll put my slow cooker on the 10 hour setting, and slightly askew my lid as my machine runs a little hot.
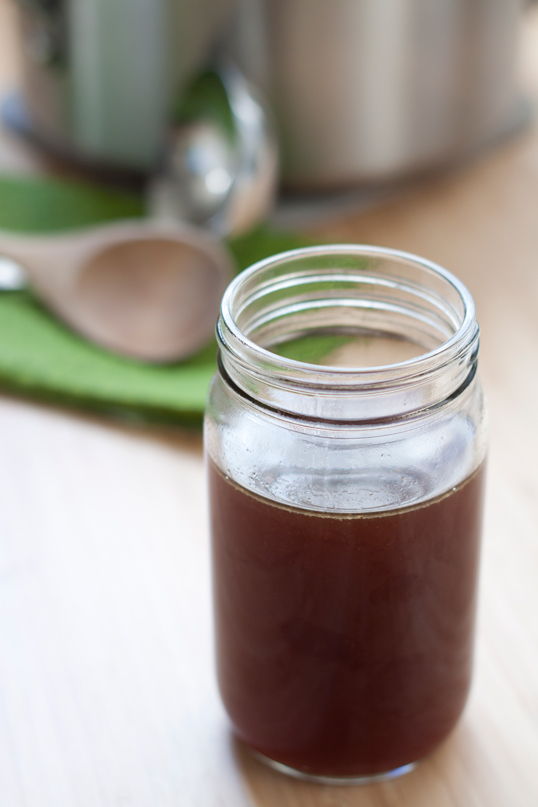
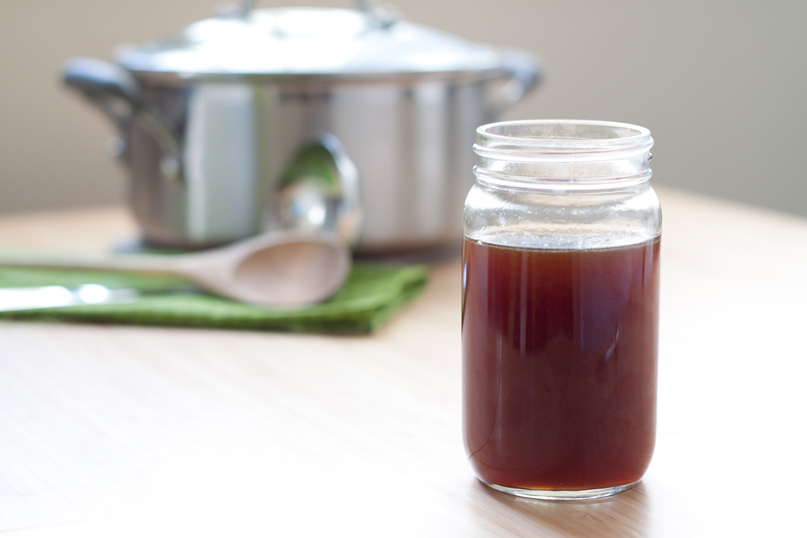
Step 6 – 12, 24, or possibly 48 hours later, it’s time to strain out your liquid and store your broth. Grab a sieve, a cheesecloth, a funnel, and a container you’d like to store your broth in. Place your cheesecloth in your sieve, place your sieve over your container, and then ladle in the liquid from your pot, straining into the cheesecloth all the veg, and bones. You should be left with just a hot, brown broth in your container.
Step 7 – Optional step: Allow your broth to cool and scrape off any fat that has risen and hardened on the surface. I’m super lazy so I tend to skip this step.
Step 8 – It’s time to store your bone broth. Be sure to use an air-tight container. You’ll be able to keep your bone broth in the fridge for up to a week, or freeze it for several months. I like to pour half of my broth into a big mason jar to put in the fridge to make soup, and the rest I pour into containers, or silicone muffin cups, and then freeze for later use.
Bonus Tips
- Save all the bones from your meals. If you regularly buy bone-in cuts of meat from happy animals, then you can just save your bones as you go. Throw them into a big freezer bag and then when you have enough you’re ready to make a batch of broth!
- Roast your bones for a deeper flavour. I only do this if the bones I’m working with are raw, but I’ve definitely noticed an improved, richer flavour.
- Soak the bones first in vinegar for at least an hour before heating the water. Then as the bones and water reach a boil, scrape any foam or scum that rises to the water’s surface.
- Cook your bones for 12-48 hours – the longer the better!
- Add fresh herbs like parsley or cilantro near the end of the cooking time for an added shot of minerals and nutrients.
- Other vegetables and herbs you can add to change the flavour of your both are: Onion, green onion, leek, carrot, garlic, celery, salt, pepper, whole peppercorns, red pepper, flakes, parsley, bay leaf, rosemary, thyme, sage, ginger.
- It’s best to avoid using broccoli, cabbage, Brussels sprouts, green peppers, turnips, collard greens, and mustard greens as these vegetables can turn your broth bitter.
- Use silicone muffin cups to freeze bone broth into pucks. This allows you to easily grab ½ a cup of broth at a time to add to recipes, or to your morning mug of broth.
- Reuse your bones! Don’t throw those bones away once you’re done, simply add them to a ziplock bag and re-freeze until you’re ready to make another batch of broth. You can use your bones over and over again until your bones have gone soft. This is the best way to get the most bang for your buck! I’ll personally add reused bones to my broth with new bones so that I have a blend of both.
Broth that Gels
I have to be straight up honest with you, I have gel shame. I’ve never successfully made a batch of broth that has gelled. When you read about broth on the Internet, blog authors everywhere boast about the gelatinous gold that their broth turns into, and it has made me feel unworthy in the past.
BUT, I will say, that my broth is delicious regardless of whether or not it gels, and I know it’s just as nutritious. So if your broth hasn’t gelled, don’t worry about it, but here are a couple of reasons from the Healthy Home Economist explaining why your broth might not have ended up exactly the way you thought it would:
- You may not be using enough bones, or the right type of bones.
- The broth hasn’t cooked long enough to extract enough gelatin out of the bones.
- The broth simmered at too high of a temperature (I think this is one of my biggest contributing factors to broth that doesn’t gel, since I know my crockpot runs a little too hot, even on the lowest setting.)
- Too much water was used in proportion to the amount of bones you have.
- You used bones from animals that weren’t raised on their proper diet, or were raised in poor living conditions.
So what do ya think? Are you convinced of the nourishing, healing magic of bone broth? Are you ready to try making your own batch? Let me know in the comments below how your own broth turned out. And if you’re looking for an easy, nutritious way to use your broth right away, check out my Ginger, Squash & Carrot Soup recipe.